

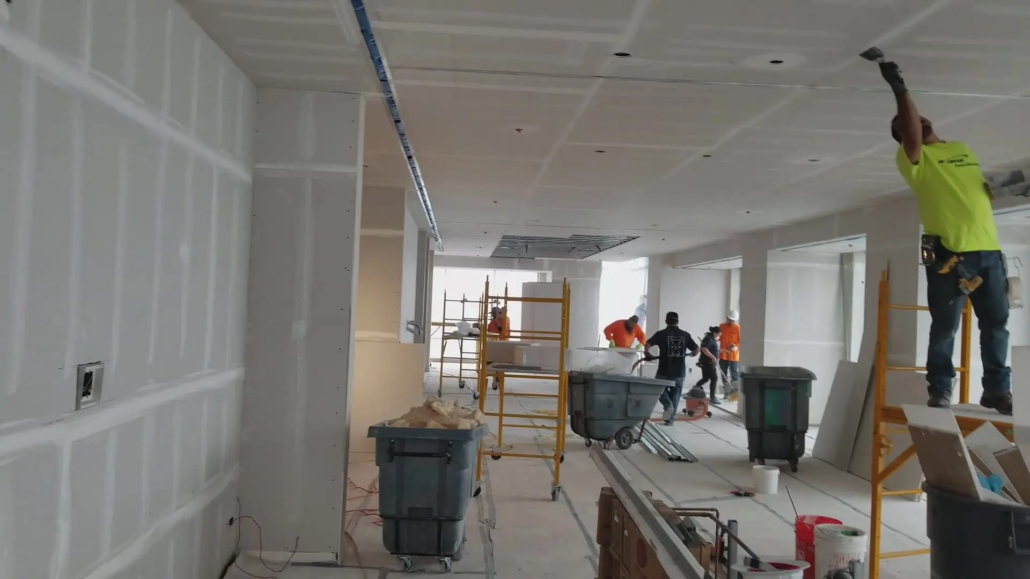
10 Signs of Drywall Problems And How to Fix Them
Dealing with drywall trouble is quite frequent in the United States. If this applies to you and you’re looking to learn about drywall issues and the ways to mend them, then this article is what you need.
In this piece, we’ll look into 10 indicators of drywall issues and their fixes, along with the root causes and how the time of year affects drywall. Let’s get going.
Key Takeaways
- Check your wall panels for preliminary warning signs such as skinny fissures, mild discoloration, or marks.
- Discover methods to deal with these promptly to avoid larger issues down the street, which will certainly incur more expense.
- If you take a look at minor flaws, sticking out fasteners, or small gaps at the completed exterior, those are commonly fixable. However, if extensive water access, mold boom, or sagging areas are seen, a full change of the forums might be required.
- Opt for center-of-the-street seasons like springtime or fall for the quality drying weather. Avoid very soggy spells or robust, arid heat while getting the wall surfaces equipped.
- In moist areas, you might opt for moisture-repellent boards, base coats, or surface treatments, combined with reliable filler and barrier strips to avoid various issues later.
- Before starting any drywall jobs, get estimates from experienced experts in the area to make sure you stick to your spending plan and timeline.
The 10 Common Drywall Problems and Fixes
-
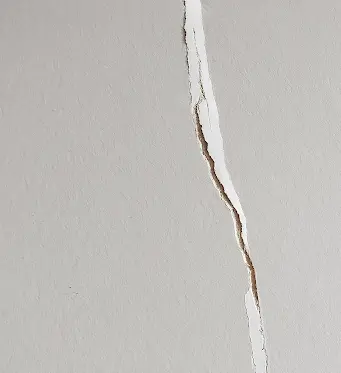
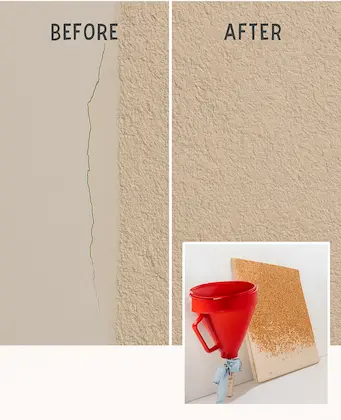
Cracks in the Drywall
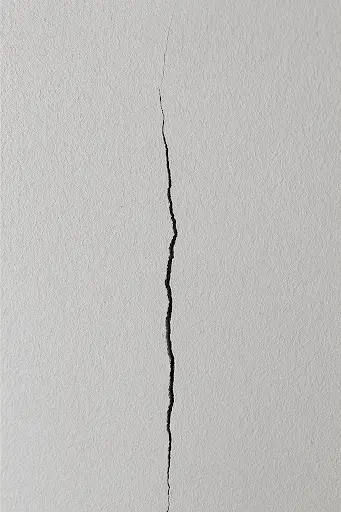
These appear as fine streaks, similar to a spider’s web, or greater fractures, and are most frequently observed near corners, though they may also emanate from a window or door casing.
Regarding their origins, they arise when dwellings shift, fluctuations in warmth and dampness affect the construction, and considerable weight puts strain on the wall. Another factor contributing to these drywall problems is the method of application. Likewise, moisture impairment degrades the material’s integrity, leading to fissures on the drywall’s exterior.
Solutions
- Use a knife to open the crack a little and to stick the compound properly.
- Use mesh or fiber tape across the crack.
- Then, put on joint compound in the crack. Let it dry and then sand it.
- For better finishes, repeat the procedure.
- Apply the primer and then paint to get a constant result
- Keep watching the surface. If you see the cracks again, consult a drywall contractor for a better solution.
2. Water Leakage & Staining
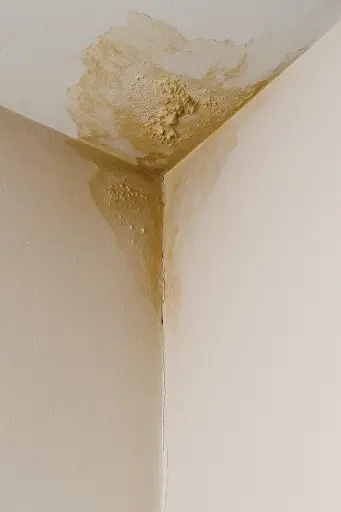
If you observe brown or yellowish blotches or water rings on the wall, they can be due to water leakage in the drywall. Peeling paint or soft, spongy drywall or also common signs of drywall issues.
Generally, these occur because of breaches in the water lines, seepage through the roof or openings, or an inadequate exterior water runoff setup. Moreover, the problem is more frequent in moist zones such as washrooms and cellars.
Solution
- The leaky pipes and roof need fixing first. So hunt down and stop the source of moisture.
- Then cut or remove the damage drywall. It is the most important step if the drywall feels soft.
- Use fans or dehumidifiers to dry the cavity properly.
- Next, replace the damage drywall panel/section.
- Then, apply the stain blocking primer and paint the area, getting constant results.
- You can add an insulation or moisture barrier to fix the issues on the exterior drywalls.
Also Read: How Much Does Drywall Installation Cost in 2025?
3. Nail & Screw Pops
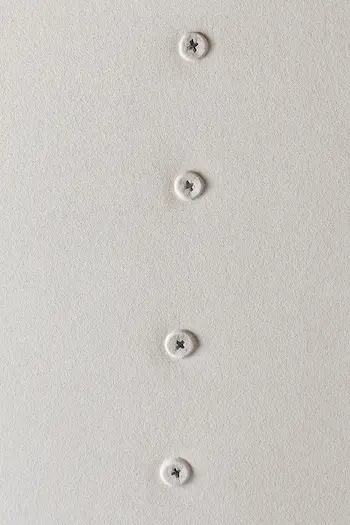
They look like little bumps or circles in the drywall and are often in rows where fasteners have come out and cracked the paint around them. Primary causes for this problem often involve shifted timber framing members, inadequately secured fasteners during setup, and substantial objects that lack proper anchoring, leading to heightened strain on the partition.
Solution
- First, remove the popped screws or nails from the drywall.
- Insert a new drywall screws into a stud. Choose a little above or below the section, avoiding the same hole.
- Then cover the head with joint compound. Let it dry and sand the surface.
- In case of many pops, apply a mud skim coat and tape for reinforcement.
- Then apply the primer and paint the surface.
4. Holes & Dents
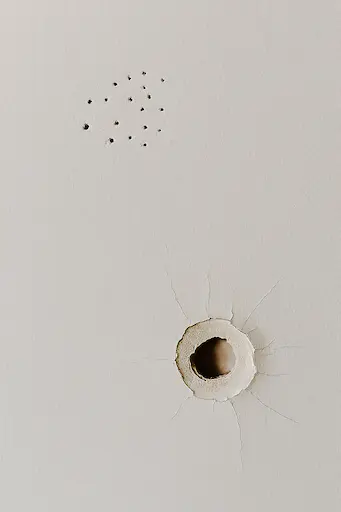
Holes and dents in drywall look like a puncture mark from the nail or wall anchors. They are shallow dents from furniture, and you can even see larger holes from accidental impact.
The common reasons behind this issue include hanging pictures or TVs, bumps from doors, furniture, or tools, cutting mistakes during installation, and coming out of wall anchors.
Solution
The solution depends on the size.
| Small Holes | Dents | Medium Holes | Large Holes |
| For holes <1 inch, use speckle or joint compound, and smooth it with a putty knife. Then, apply the sand and paint. | For dents, fill the hole with mud first. Feather the edges, and then send the surface. | They can be ~4 inches. Use a mesh patch kit, apply compound, next sand and paint the surface. | First, cut off the shape, like a square or a circle, according to the damage. Fit a piece of new drywall into a baking board or stud. Then, apply the tape, mud, sand, and paint the surface. |
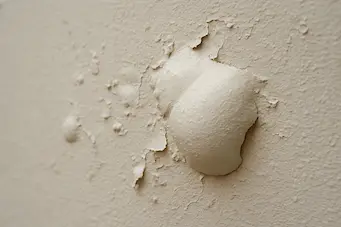
5. Uneven Surfaces (Bulges, Waves, Sagging)
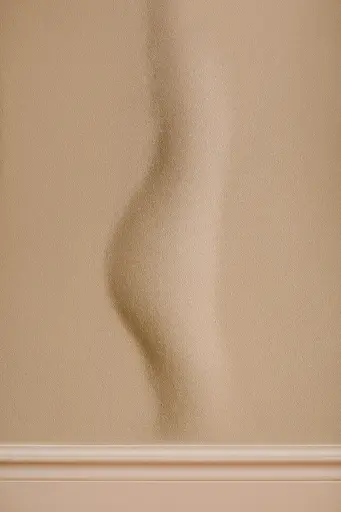
You can easily see an uneven surface on the drywall. They are not flat and lump under the tape, sagging the panels with visible waves.
The most common reasons behind this issue include moisture wrapping the drywall, poor installation method, and the shifting of studs and framing.
Solution
- First, find and fix any moisture issues with the drywall that needs repair.
- If the drywall has minor bumps, remove the existing tape, reapply the compound and paint it. You can use the sand to smooth it.
- But if the harm is large, you’ll need to eliminate and install a new section of the damaged wallboard.
- Once swapped out, cover the joints with tape, then plaster and smooth the place for an ideal end.
- Remember to apply a better finish degree, like stage 4 or stage 5, to get the best results.
6. Bubbling or Peeling Paint
Paint that is effervescent or flaking seems as small blisters beneath the surface of the wall material, or as indifferent sections where the coating is peeling away from the wall. You are capable of scratching the paint right off.
Typical causes for this hassle involve moisture trapped beneath the paint, failing to apply primer to new wallboard, paint layers that do not consider each other differently, or sudden shifts in temperature. Multiple layers of aged paint that adhere poorly are another possible source for paint bubbling or peeling.
Solution
- Take off any flaking or lifting paint.
- Roughen the surface so the brand-new coat adheres nicely.
- Use a primer that blocks stains, especially where dampness is a problem.
- Select pinnacle-grade paint providing resistance to mold and dampness.
- Make sure the space is well-ventilated to prevent this trouble from ordinary.
7. Mold Growth
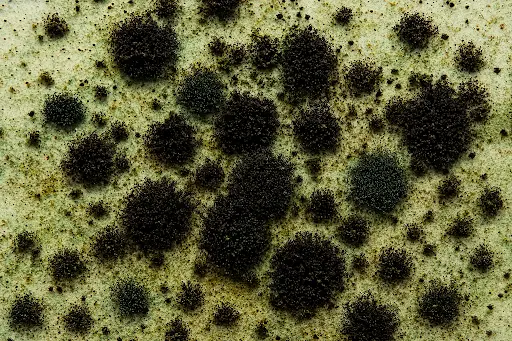
Suppose you observe black, green, or white patches on the wall or floor, which show mold development. These patches may be fuzzy or slick, regularly showing up in corners, beyond furnishings, or near plumbing troubles.
Common causes for mold arising on gypsum board consist of ongoing dampness from seepage or water damage, insufficient airflow inside a space, particularly in constrained spaces, cellars, and bathrooms. Employing traditional wallboard in moist zones instead of panels designed to resist dampness can likewise result in mold proliferation.
Also Read: How Much Does It Cost to Build a Two-Car Garage in 2025?
Solution
- Suppose it’s a small patch, first clean with a mixture (1 part bleach and 3 parts water or vinegar).
- Use gloves and a mask when removing the mold.
- For large areas, you need to cut out the affected drywall piece and replace it.
- Use a mold inhibitor to clean and treat studs and frames.
- Choose mold-resistant drywall this time.
- Apply the primer on the surface with mold-inhibiting property, and then paint.
- Ensure proper air flow or ventilation, or use a dehumidifier or exhaust fans in this area to avoid this issue again.
8. Seasonal Shrinkage & Expansion Cracks
They look like simple, tiny cracks and appear around seams and inside corners. The Winter season is more susceptible to cracks as compared to the summer time. The common reasons behind this include:
- Wood framing shrinks in winter dry air; expands in humid summer.
- Changes in temperature and humidity stress tape, compound, and drywall.
- Joints and corners are especially vulnerable.
Solution
- Avoid paper tape. Prefer flexible, fiber mesh tape for weak joints.
- Use a good-quality joint compound to get good results.
- Once the compound is dried, slightly sand the area and then paint it.
- Do inspections after every season and give touch-up to small cracks to avoid significant issues and high drywall repairing costs.
9. Texture Problems (Mismatched Finishes)
Some patches look flatter and some bumpier. Also, the affected surface texture is different from the rest of the wall. It is more sensitive when you move your hand on the surface. What causes it include different finishing methods or label skill level, poor application of compound, improper sanding, and skipping skim coating.
Solution
- Sand the mended section to level any uneven areas.
- Apply a thin layer of drywall mud across the whole spot for a uniform surface.
- Blend the borders gradually for a smooth visual connection.
- Allow it to dry completely, then apply primer and paint.
- For walls with a particular texture (like orange peel or knockdown), replicate that look by experimenting on spare drywall first.
10. Poor Corner Beading or Reinforcement
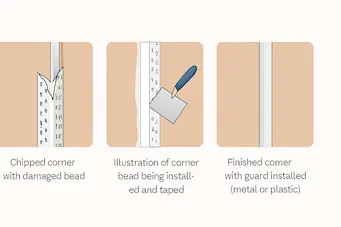
They are the corners that are chipped, soft, or cracked. If it is a metal or vinyl corner bead, they might be popping out. The corner feels fragile or dented. The most common reasons behind poor corner beading or reinforcement include bad installation methods, seasonal damage over time, moisture wrapping the corners, and low-quality corner beads.
Solution
- Take out any broken or detached edge trim.
- Put in a fresh, premium metal or plastic corner protector.
- Fasten it securely with appropriate hardware.
- Apply joint compound on both faces, embed mesh, and layer several coats.
- Smooth, seal, and colorize.
- For heavily used angles, think about incorporating a corner protector (metal or plastic) for lasting defense.
Seasonal Impact on Drywall
During warmer months, moisture causes materials to expand. Conversely, in winter, dryness leads to shrinkage. This alternating movement, encompassing both growth and reduction, places strain upon the fastenings, hardware, and sealing materials within the wallboard.
- During periods of high dampness, wallboard may soak up dampness, causing bending or mildew.
- In very arid months, the wall material and structural elements shrink, creating small fissures.
So, do repair work in mild weather (ideally spring or fall). Similarly, use a humidifier in winter; a dehumidifier or exhaust fans in summer. You can also use flexible joint compound and quality materials that can handle seasonal shifts.
Repair vs. Replace: When to Do What
Repair if:
- Damage is limited, hairline cracks, small nail pops, and little dents.
- There’s no soft, spongy drywall.
- No active moisture or mold.
Replace if:
- The wallboard is damp, drooping, breaking apart, or showing mildew.
- Over approximately 25–30% of the panel is affected.
- A structural issue exists, such as decaying support beams or recurring water penetration.
Pro Tip: If uncertain, arrange for an expert review. Repairing might not be expensive, but failing to spot a significant underlying problem carries a greater danger.
Tips for Avoiding Drywall Issues
- Use air flow fanatics or moisture absorbers.
- Address any leaks properly.
- During arid wintry weather months, operate a humidifier.
- For wet areas like washrooms or cellars, choose moisture- or mold-resistant wallboard.
- Always apply primer earlier than completing with paint.
- In clammy places, utilize a primer and paint that hinders mold growth.
- In angled sections, use a tape product of fiberglass or mesh.
- Put nook protectors in frequently used passages, including corridors.
- Use the good fasteners while securing sizeable gadgets.
- Conduct a check every three months or with the changing of seasons, analyzing for fissures, pliable regions, bubbles, or marks.
- Repair minor flaws right away upon detection.
What to Do Before You Start Fixing Drywall?
- Make a plan and decide which parts need repair.
- Choose the right drywall type. Buy enough compound, tape, screws, bead, primer, and paint. And don’t overbuy, especially compound, because it dries out over time.
- Figure out drywall mending expenses. Even for a homeowner project, determine the price for joint compound, paneling, and related materials. When employing a technician, seek several estimates. Share your preparations and blueprint so they can budget accurately.
- Establish a suitable work zone by tidying the space and spreading protective sheeting. Employ ventilation and moisture removers to manage a drying climate. Keep your implements, such as a utility blade, a taping knife, and an abrasive tool, at hand.
Last Words
You can see the issues with the drywall with only minor observations. Just look for cracks, discoloration, or mold growth. If you see any one of them, ask yourself self following questions.
- Is this new?
- Is it getting worse?
- Does it feel soft or sound hollow?
If the answer is “yes” to any of those, prepare your mind for an expense (can be low or high). If it’s minor and within your capability, proceed. Nevertheless, if the problem appears substantial, seek aid from specialists. Moreover, before engaging a professional for the repair, obtain quotes from drywall estimators to prevent excessive expenditure.
FAQs
What’s the fee for drywall repair throughout the US?
It varies based on how severe the drywall damage is. Generally, count on a fee range of $350 to $650 inside the United States.
What is the cost of replacing drywall in the US?
The standard charge stages from $1.50 to $3.50 in line with square foot.
How long does it take to fix a drywall problem?
The specific length relies on the degree of the drywall’s impairment. Typically, count on a time frame of two to 3 days.
Is DIY drywall repair possible?
Yes, it is possible, but in general for minor imperfections. For widespread harm, your tries bring about tremendous financial outlay.